Spring is here. With all the blooms and bright colors around, isn’t this pillow perfect for the season?
I also gave this pillowcase as a gift to my sister-in-law. I thought it looked beautiful! Everybody wowed it when she opened this as a gift, and this made me happy too. She should have wished there’s 2 of them, but I only had enough fabric for it:(
Here’s what you need:
A. Preparing your pattern.
(1) The “Front Body” Pattern. Measure a perfect 18x18 square inch on a pattern paper, then mark 1/2 inch allowance on all sides. This will make your total square pattern to 19x19 inches.
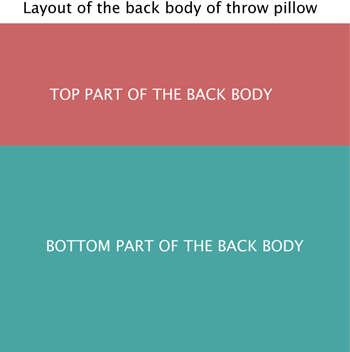
(2) The “Back Body” Pattern. You will need two patterns for the back of your throw pillow, where you will then be able to place your pillow fill.
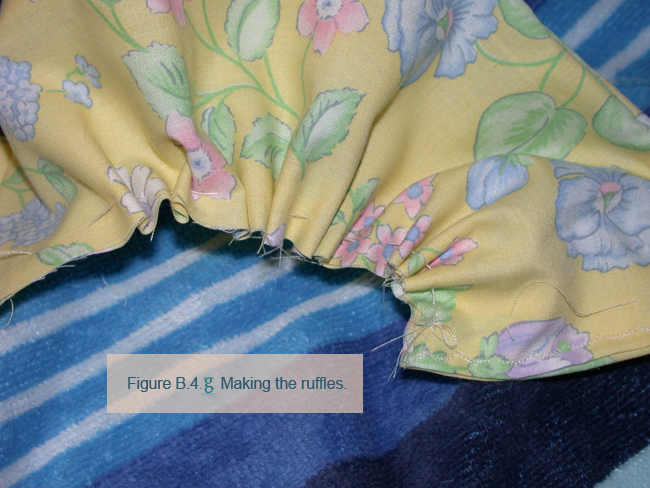
(3) Making the ruffles. Pattern for this is not necessary as you can measure the fabric directly. However, patterns will make your work much easier especially if your sewing expertise is beginner. The total fabric size to cut is 168” by 7”.
B. Sewing method
B.1 Sewing the top part of the back body.
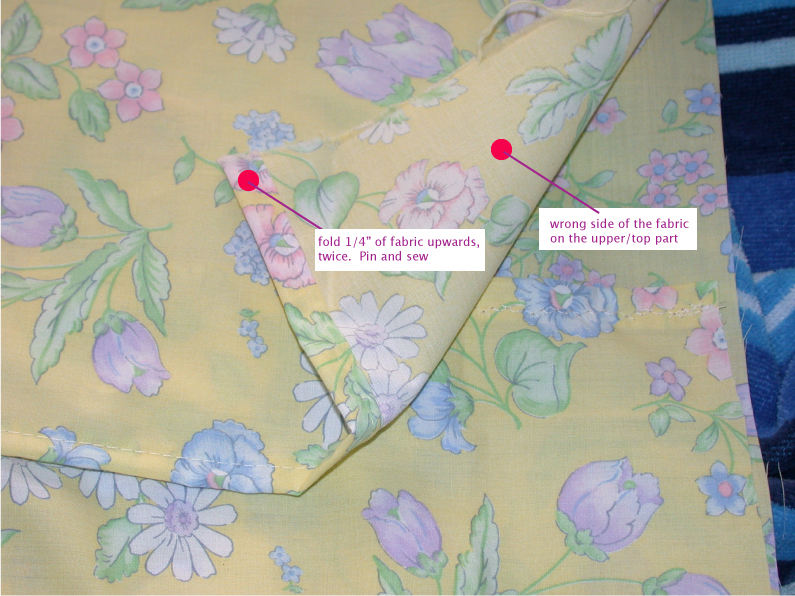
Lay the fabric with wrong side facing you. At the bottom edge, or the top part of the fabric (refer to figure B.1 below), fold 1/4” of fabric upwards, twice. Pin and sew.
Figure B1. Sewing the upper part of the back body.
B.2 Sewing the bottom part of the back body.
Lay the fabric with wrong side facing you. At the top edge or the other end of the bottom fabric (refer to figure B.1 above), fold 1/4” downwards, twice. Pin and sew.
B.3 Sewing the top and bottom parts together for the back body.
(a)
Lay the bottom part of the back body fabric with right side facing you, sewn edge facing away from you (Figure B.3.a)
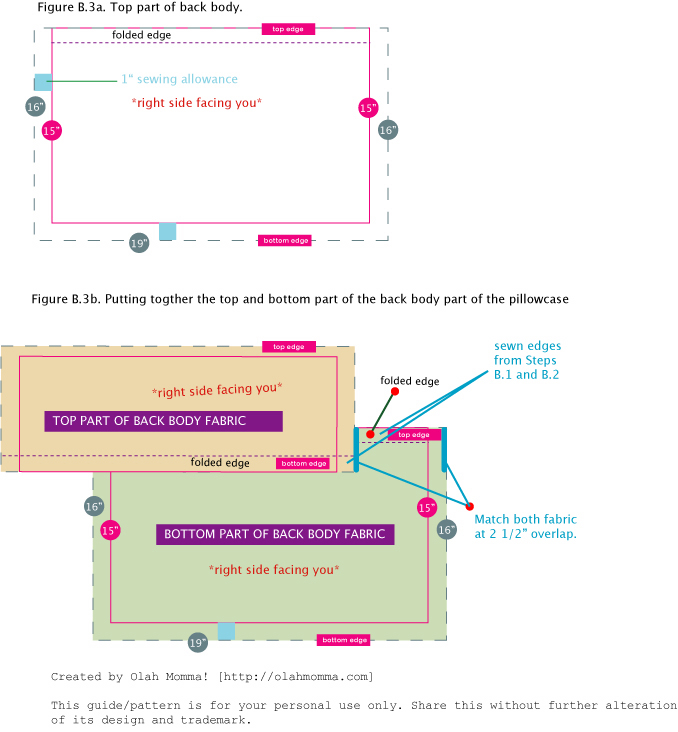
(b) Lay the top part of the back body fabric with right side facing you over the top edge of back body fabric’s bottom part at overlap of 2 1/2” (Figure B.3.b above)
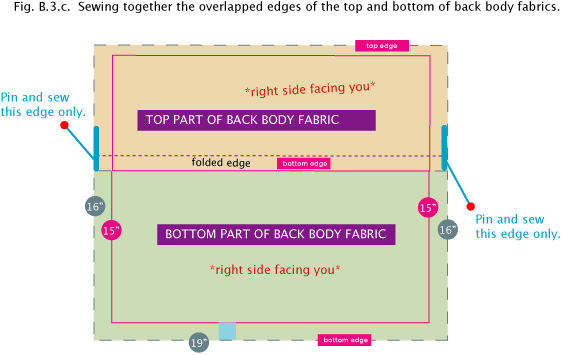
(c) Pin together the edge of the overlapped section of the fabrics, then sew (Figure B.3.c below)
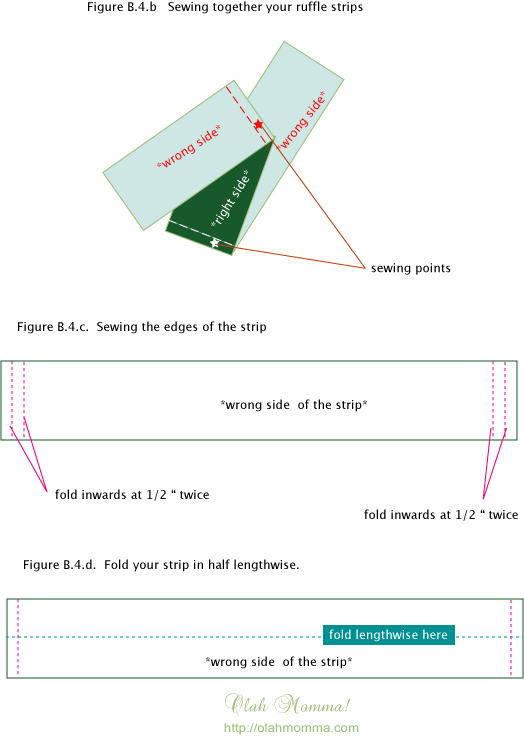
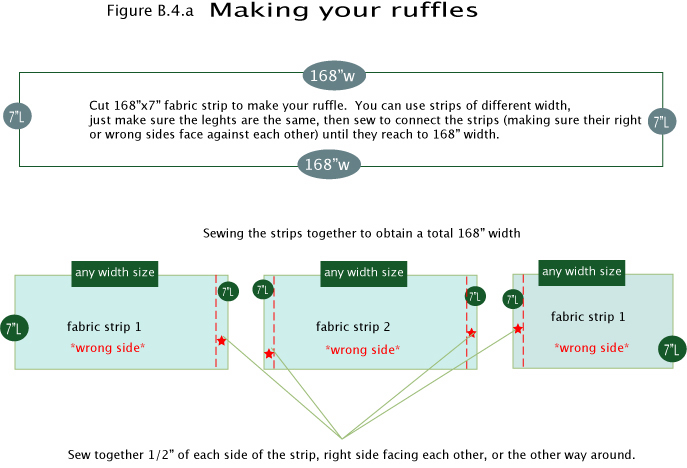
B.4 Sewing the ruffle strip/s.
(a) Cut a total 168” x 7” fabric strip. This can also be obtained by using strips of different width, just make sure the lengths are the same, then sew to connect the strips (making sure their right or wrong sides face against each other) until they reached to 168” width. Refer to Figure B.4.a and B.4.b for sewing the strips together.
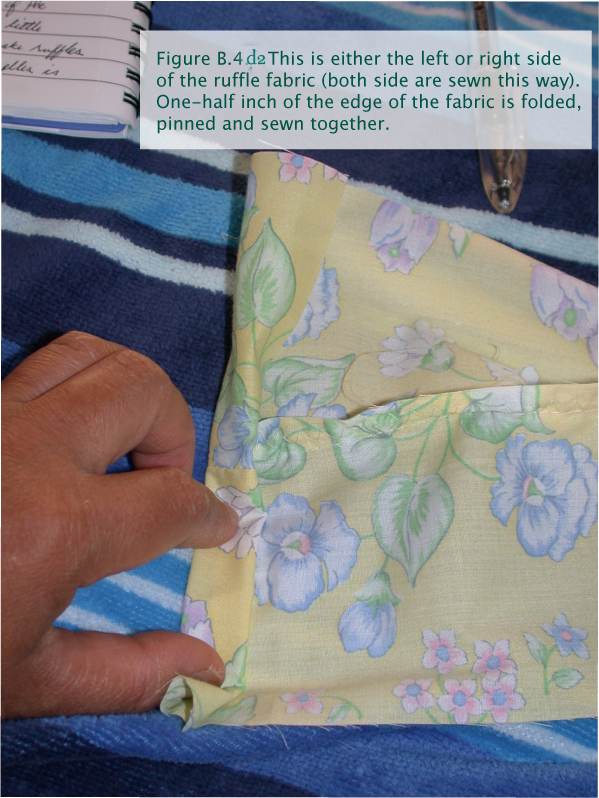
(b)
With the wrong side of the fabric facing you, fold the left and right edges of the strip at 1/2” once, then fold the strip lengthwise and sew together (refer to Figure B.4.d above or Figure B.4 d2 right below).
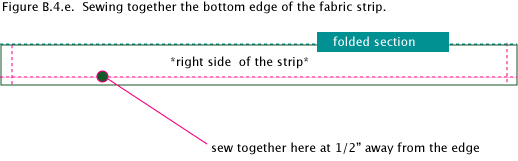
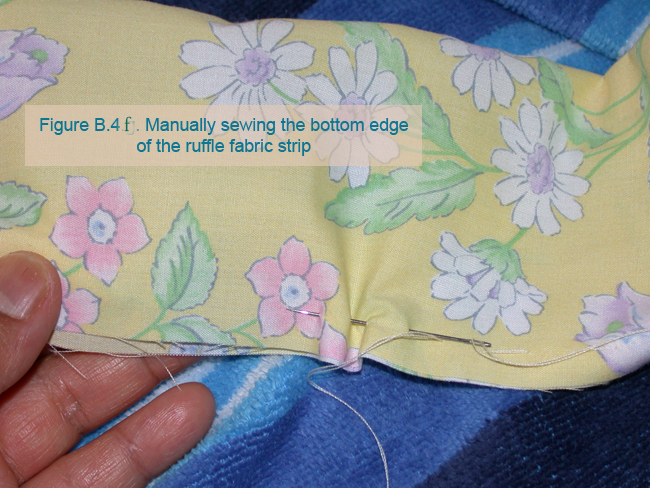
(c) Preparing the ruffles. Manually sew the bottom part of the fabric strip, which is the opposite of the folded part (Figure B.4.e).
B.5 Preparing the front part of the pillowcase.
There’s nothing much to do for this at this time, unless you decide to decorate it with a plain ribbon.
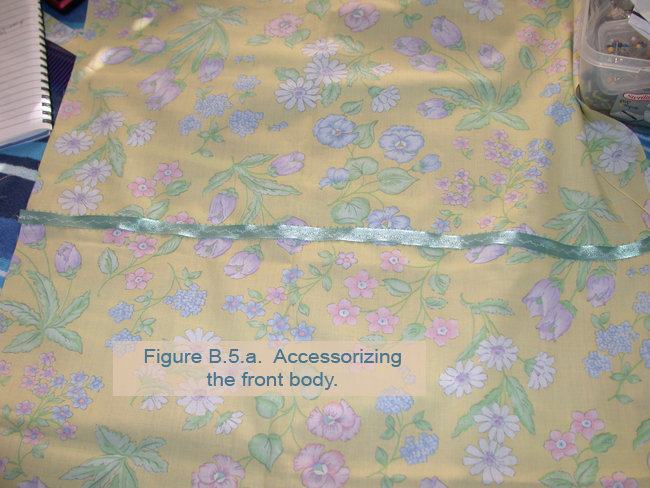
From the picture above, a thin blue ribbon was sewn directly in the middle of the front cover fabric.
B.6 Putting it all together.
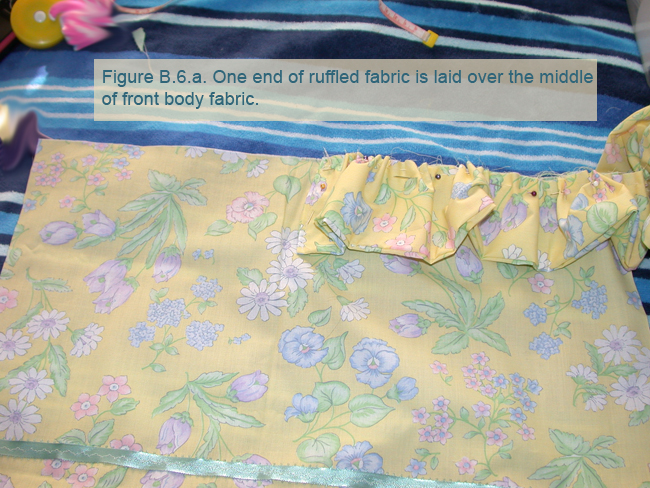
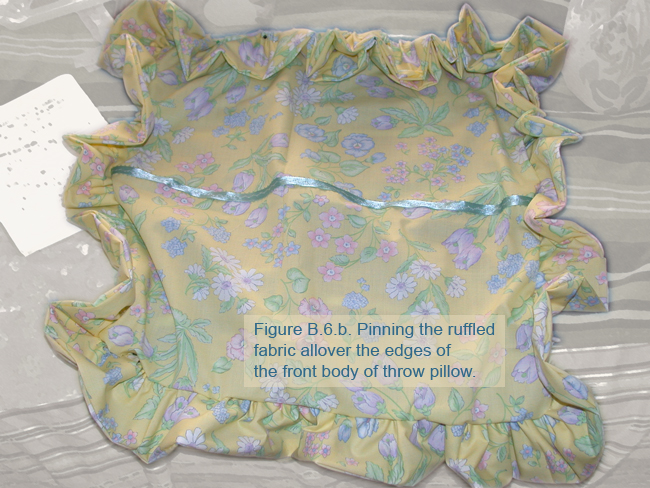
(a) Lay down the FRONT PART of the pillowcase with right side facing you, and starting at the middle edge of its one side, lay over one end of ruffled fabric with its folded side facing downwards, and pin the edges together (Figure B.6.a)
Surround the front fabric with the ruffles pinning the edges together until you reach to the other end, which there may be an overlap, which is recommended (Figure B.6.b).
(b) Sew the pinned edges together (don’t forget to remove the pins) starting away from overlapped ruffles in case you would need any adjustments as you go through.
B.7 Finishing it.
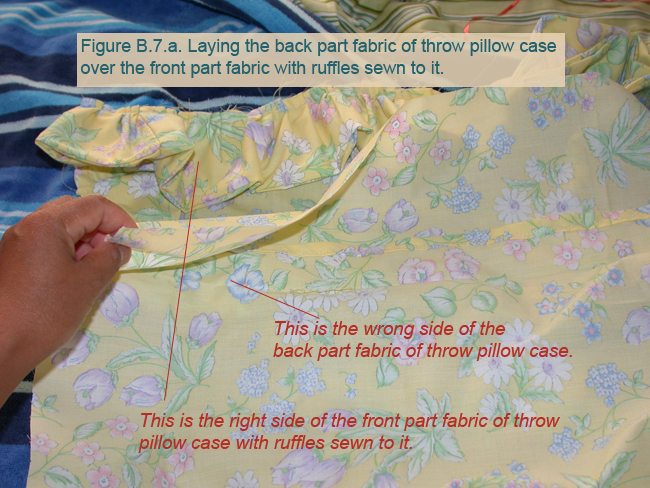
(a) Over the right side of your ruffled front body fabric, lay your prepared back body with its wrong side facing you. Match the edges carefully by pinning them, and then sew (Figure B.7.a).
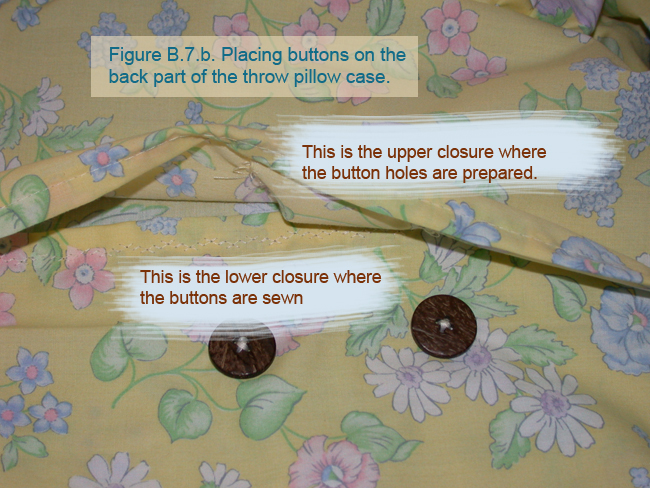
(b) Turn inside out. Now you have the throw pillow case on its right sides. You may then add 2 buttons on the bottom closure, and make corresponding bottom holes on the upper closure (Figure B.7.b).
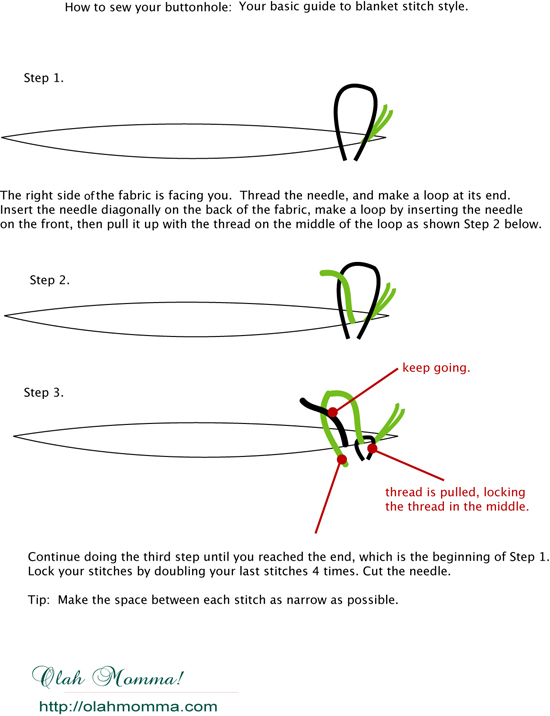
(c) Making the buttonholes.
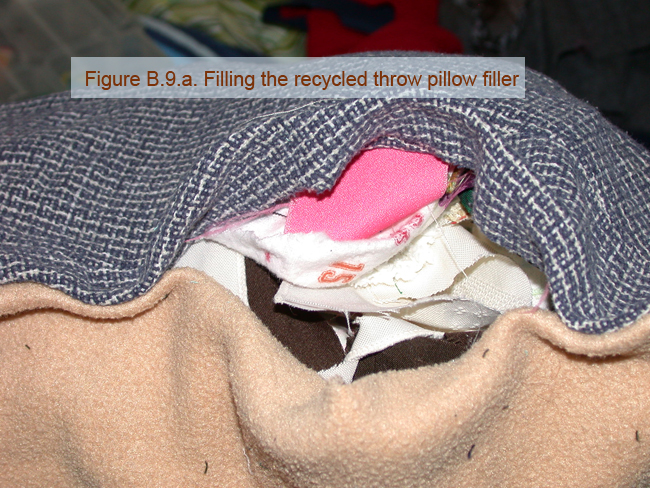
B.9 Making the recycled filler (optional).
(a) Use your front body pattern as your guide in making the body of your filler. Cut 2 of 19” x 19” fabric. Match them as equal as possible with both right sides facing each other. Pin and sew together all its edges, and leave about 5 inches open. Turn inside out, and fill with fiberfill or tiny fabric remnants, which are also good fillers. However, if you use the latter, you may not wash your pillow filler as this may hardly dry (Figure B.9.a).
Optionally also, you may accessorize your new throw pillow with handmade flowers (tutorial for this is coming soon).
Enjoy your new creation!


Don't want to use the facebook comment box? No worries. Pretty please use the form below...
Comments
Thank you for linking up with
Thank you for linking up with the Planet Weidknecht Weekend Hop!